

Print Ready Artwork Guide: Vector Logos, Bleed and Pantone

Print ready artwork is a design file that a printer can use straight away, with no fixes: the right size, a vector or high resolution format, print colours, bleed where needed and fonts that cannot go missing. This print ready artwork guide walks through the nine checks we run on every file, which formats to send, how bleed and safe zones work and how to prepare artwork for each product, from office stationery to boxes and packaging.
The short version: send a vector logo (AI, EPS, SVG or a vector PDF), set colours in CMYK or Pantone, add 3 mm bleed to anything printed edge to edge, keep text inside a safe zone and outline or embed every font. If you do not have files like this, our design team can prepare them for you.
What print ready artwork means
A printer needs more than a file that looks right on screen. Screens show colour in RGB light, while presses and garment printers lay down ink, and a small logo saved from a website can look sharp on a phone but print blurred on a banner. Print ready files remove those surprises before production starts.
Most delays on merchandise orders come from artwork, not from the products. A logo copied from an email signature, a PDF with missing fonts or a background that stops exactly at the edge all mean a second round of files. Checking the points below first saves days.
Planning a branded order?
Share your quantities, budget and deadline. We reply with options, mockups and a bulk price, plus free design help.
9 print ready artwork checks before you send files

| Check | What good looks like | Why it matters |
|---|---|---|
| 1. Vector logo | AI, EPS, SVG or a vector PDF | Scales to any size with clean edges |
| 2. Right size | Artwork built at the final print size | Avoids stretching and soft edges |
| 3. Resolution | Photos at 300 DPI at print size | Lower resolution prints blurred or pixelated |
| 4. Colour mode | CMYK, or Pantone for exact brand colours | RGB colours shift when converted to ink |
| 5. Bleed | 3 mm of background past each trimmed edge | Prevents thin white lines after cutting |
| 6. Safe zone | Text 3 to 5 mm inside the trim line | Keeps words from being cut off |
| 7. Fonts | Converted to outlines or embedded | Stops the printer’s system swapping fonts |
| 8. Fine detail | No hairlines or very small text | Thin lines disappear in print and stitching |
| 9. Proof | Mockup checked and approved in writing | Last chance to catch spelling and position |
Not every print ready artwork check applies to every item. A logo on a pen needs points 1, 4, 7 and 8, while a business card or a box needs all nine.
Vector vs raster: which file format to send
Vector graphics are made of paths, so they stay sharp at any size, from a pen to a roll up banner. Raster files such as PNG and JPEG are made of pixels, so they only print well at the size and resolution they were created for.
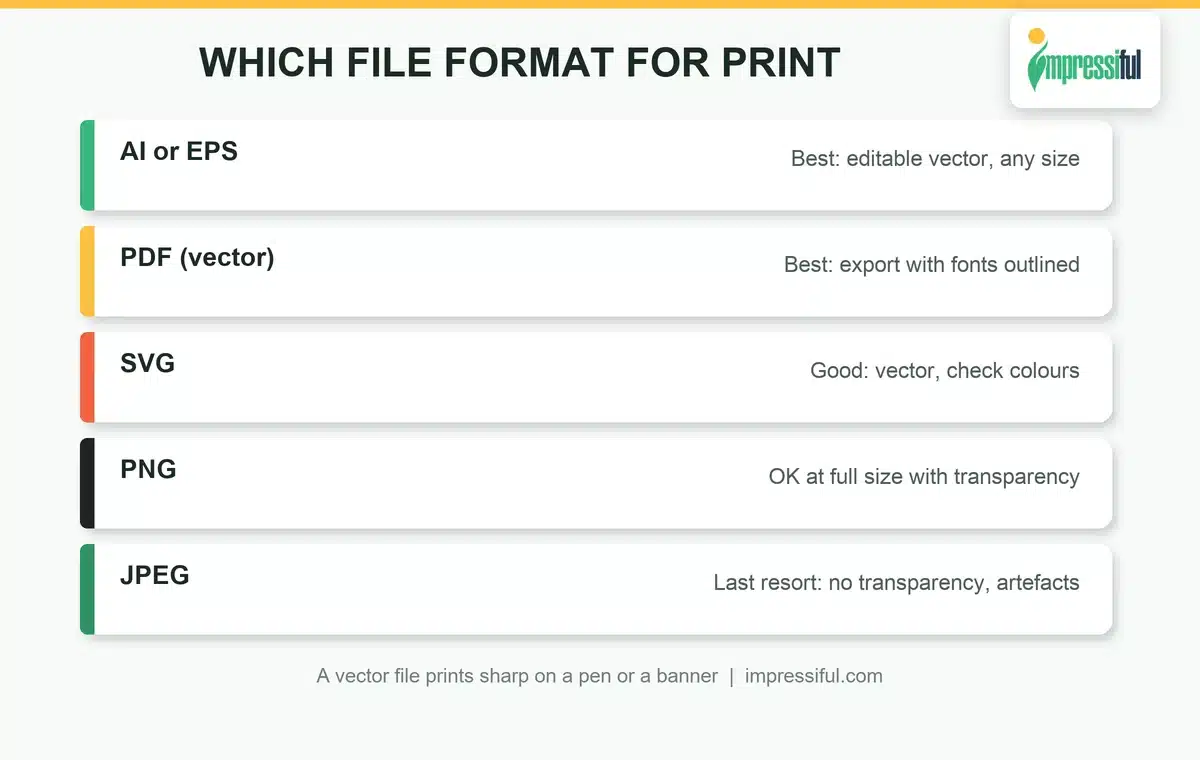
- AI and EPS: the standard for logos. Ask your designer or agency for these first.
- PDF: ideal when exported from design software with fonts outlined or embedded. A print standard such as PDF/X keeps colours and fonts locked.
- SVG: a vector format that works for most logos, though colours may need checking.
- PNG: acceptable for full colour garment prints when supplied at full size with a transparent background.
- JPEG: a last resort. It has no transparency, so a white box often appears behind the logo.
Saving a JPEG as a PDF or SVG does not make it vector. If you are not sure what you have, send it and we will check whether it is print ready.
Colour: CMYK, Pantone and RGB
Design print ready artwork in the CMYK colour model, the four inks most printers use. Bright RGB greens, blues and oranges often cannot be matched in CMYK and come out duller, so convert early and judge the colour after conversion.
For exact brand colours, give the Pantone reference from your brand guidelines. It is the common language between your designer, our team and the factory. Remember that the same colour looks different on white paper, a black t-shirt, kraft board or brushed steel, which is why you approve a mockup before production.
Bleed, trim and safe zone

Print ready files for anything printed to the edge, such as business cards, flyers, stickers and boxes, need extra care, because the item is printed on a larger sheet and cut. The cutter can move slightly, so the background must run past the edge. That extra area is the bleed, usually 3 mm on each side. The safe zone works the other way: keep logos and text 3 to 5 mm inside the trim line.
Curved and shaped items have their own rules. On mugs and tumblers, keep the design clear of the handle, lid band and base curve; on caps and bags, follow the print area in the template we send.
Print ready artwork by product and method
Each decoration method has its own print ready artwork needs. The common ones are below.
Business cards and stationery
Set up each item at its exact size with bleed, CMYK colours and a safe zone, and check details such as phone numbers twice. Our guides to business card printing and corporate stationery printing list the standard sizes.
Boxes and packaging
Packaging is printed on a flat dieline that is folded later, so place panels the right way up and keep text away from folds and glue flaps. Build the artwork on the dieline for your box style; see our retail product boxes guide for structure and finishes.
T-shirts and apparel prints
For full colour prints, send a transparent PNG at the final size and at least 300 DPI, or a vector file. Our DTF printing guide covers artwork for transfers in detail.
Embroidery
Embroidery turns artwork into stitches, so simplify fine detail, avoid gradients and keep small text larger than you would in print. Our embroidery vs printing guide explains when stitching works best. When you customise a product in our online design tool, the embroidery price is shown there.
Hard goods: pens, drinkware and tech
UV printing and engraving on hard surfaces need clean vector shapes. Engraving is one tone, so supply a one colour version of the logo, and note that small print areas such as pen barrels lose fine lines first.
Arabic and bilingual artwork
Many UAE brands print in Arabic and English. Arabic text runs right to left and joins letters, so it can break when files move between programs. Outline Arabic text in your print ready files, give each language enough space rather than shrinking one, and ask a native reader to check the final mockup. Arabic calligraphy and individual names can also go on Eid gift boxes.
How to send print ready files to Impressiful
- Collect your files: vector logo, brand colours (Pantone or CMYK) and any fonts or guidelines.
- Tell us the products: we confirm the print area and decoration method for each one.
- We check the artwork: our team flags low resolution, missing bleed or colour issues before production.
- Approve the mockup: you get a free digital mockup to approve before anything is printed.
No print ready files at all? Use request a design: share your logo, idea or brand name and our designers prepare a print ready design for you to review.
Frequently asked questions
What is print-ready artwork?
Print-ready artwork is a design file that meets everything a printer needs to produce it without changes: the correct size, vector or 300 DPI images, CMYK or Pantone colours, bleed for edge to edge designs, a safe zone for text and outlined or embedded fonts. It goes straight to production after your proof is approved.
How to make print-ready artwork?
Build the design at the final size in a program such as Illustrator or InDesign, use CMYK or Pantone colours, add 3 mm bleed where the design reaches the edge, keep text 3 to 5 mm inside the trim, outline fonts and export a print PDF. Our design team can do this for you.
How can I make an image print-ready?
Start from the largest original you have and check it is at least 300 DPI at the size it will be printed. Convert it to CMYK, crop it with bleed if it runs to the edge and save it as a high quality PDF, TIFF or PNG. Enlarging a small web image will not add detail.
What type of file is best for printing a logo?
A vector file is best for printing a logo, ideally AI, EPS or a vector PDF, because it stays sharp at any size and colours can be set exactly. SVG also works. A high resolution transparent PNG is acceptable for full colour garment prints, but a vector is still preferred.
Is PNG or JPEG better for logos?
PNG is better for logos because it supports a transparent background and keeps edges clean, while JPEG adds a white background and compression marks around text. For print, both are second choices behind a vector file. See our printing methods page for each method’s file needs.
Get your artwork checked for free
Send us your logo and tell us which products you want to brand. We will check the files, tell you if anything needs fixing, and send a free digital mockup with the price and delivery dates confirmed.
Get a free quote and artwork check
Prefer WhatsApp? Message +971 52 656 8355 and attach your files. Our office is at Office C1-1F-SF3340, Ajman Free Zone C1 Building, Ajman, UAE, open Monday to Saturday, 9:30am to 7pm.